Transportable C1 Chaser
I have a C1 Chaser, and it’s a fantastic wing. It flies great, and is very efficient. The only problem I had with it was that it’s too long to easily carry around, as it has a 1.2m wingspan.
I thought that a C1 Chaser that can break apart for easy transport would be the ideal long-range wing, so I bought a second one and made some modifications to it. I’m listing the modifications here so you can do the same if you want to.
Spar
The biggest issue is making the spar removable. The best way I’ve found to do that is to use IKEA drinking straws, they have an internal diameter of around 7.5mm, making them ideal for putting the spar through. If you find the spar has too much jiggle, I’ve found that applying some CA glue around it makes it thick enough to fit snugly in the straw.
I’ve cut three straws to length, sanded the straws and the spar channel a little with coarse sandpaper, and glued the former in the latter, as you can see here (the straw in the photo is not cut to length yet):
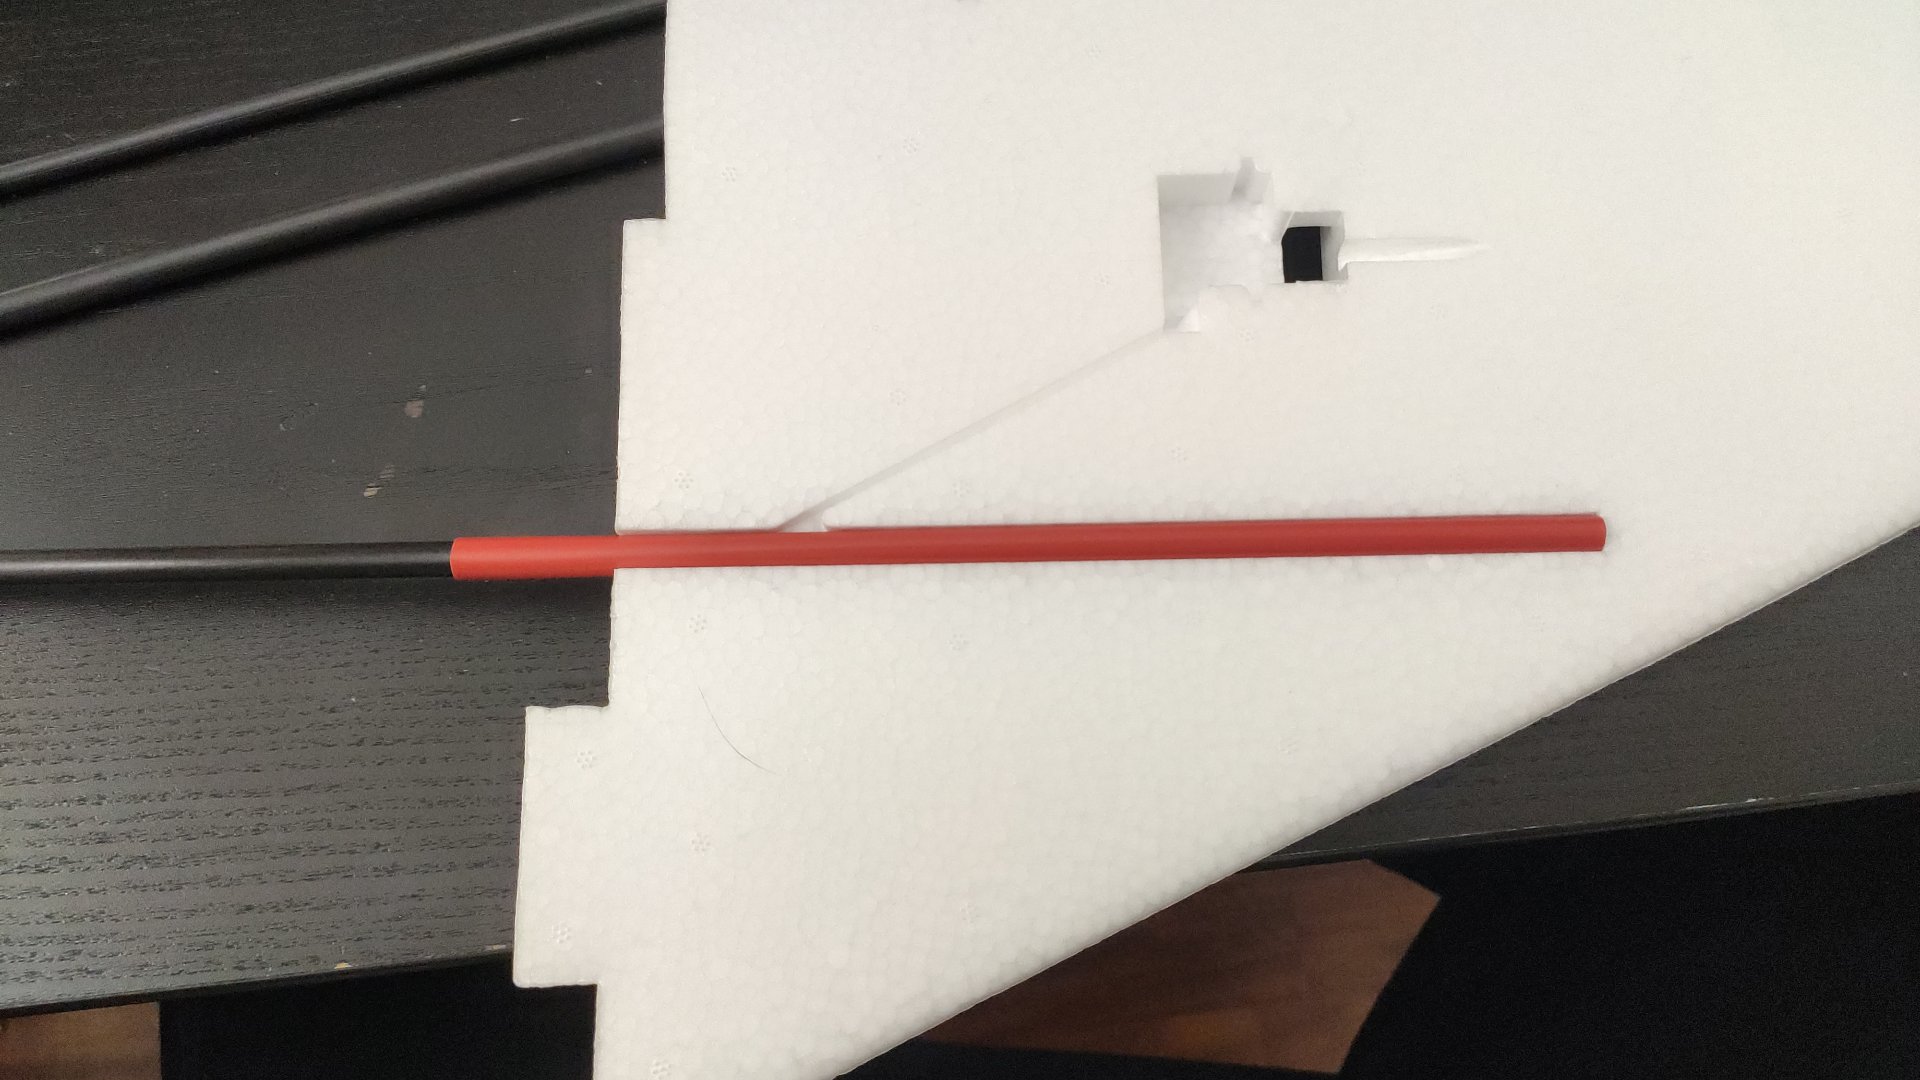
Make sure to leave a few mm from the inside edge of the wing (so the straw doesn’t touch the edge, again not pictured in the photo), so the spar’s edge doesn’t rub against the straw, to avoid splitting it. Also, leave the spar in the straws while gluing, so the straws don’t lose their shape (but make sure you don’t get glue on the spar and end up gluing it to the straw).
For glue, I use E6000 (sold as Goop in the US) for pretty much everything, but for this one you can use your favorite glue that you know won’t dissolve EPO.
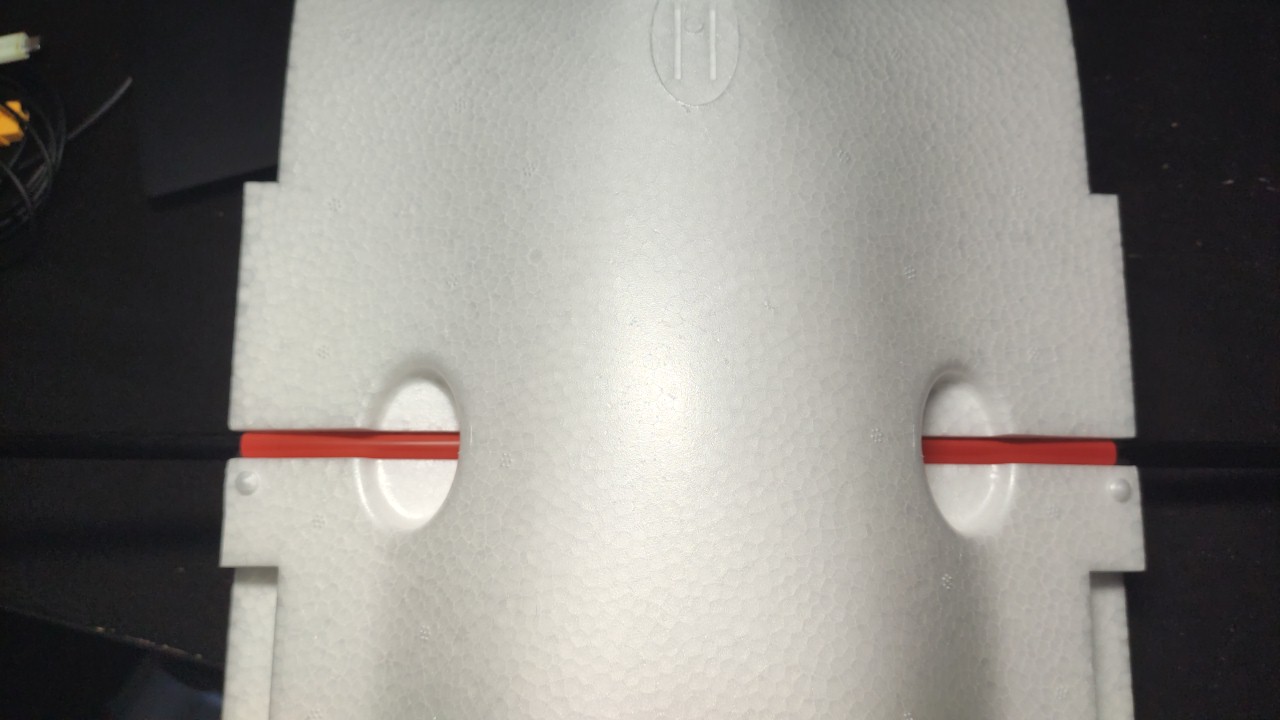
This is what the final result will look like:
Wings
Connecting the wings has two problems:
First, you need the wing to be stable against rotation around the spar. Already, the notch the C1 has stops the wing from rotating up, but it does not stop it from rotating down (since you’re meant to glue it in place).
Second, you obviously need the wing to be stable against left/right motion, or it will slide off the spar. To solve these problems, I designed a simple connector with two halves, one of which goes onto the fuselage and one onto the wing:
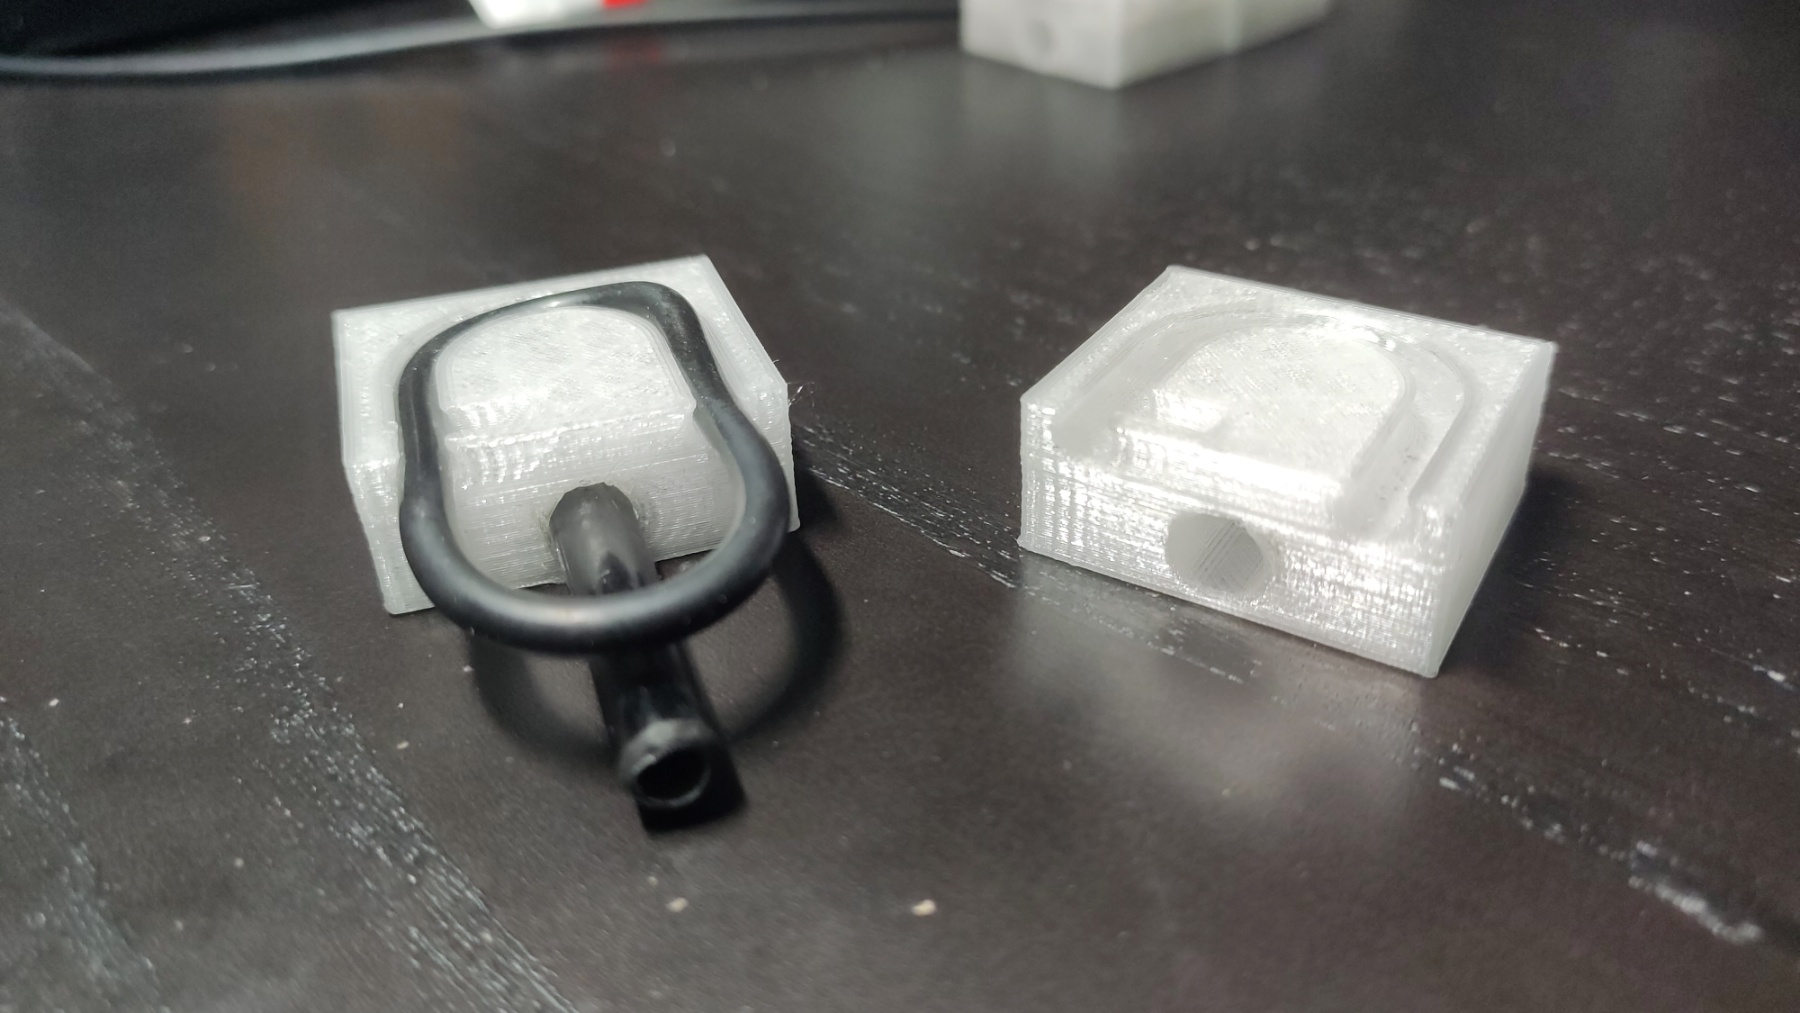
The connector has two components, one is a cylindrical channel for a carbon tube (which you can glue to one of the pieces, as in the photo) that stops the wing from rotating around the spar, and the other is a channel for an o-ring, which keeps the two halves from moving left to right.
I used a 6mm outer diameter carbon tube and an o-ring with an inner diameter of 28mm and a cross-section diameter of 3.5mm. A slightly thicker and slightly longer o-ring will also probably work.
To install, place the connector over the underside of the wing and mark the outline, then cut the foam and glue the connector in. Do the same with the other side, into the fuselage, as shown in the photo below. To make sure the connectors are glued straight, I recommend cutting the foam to shape, placing the connectors in on both sides, and sliding them into each other (using the tube), making sure to leave some distance and watch for any places where glue has leaked, to prevent the wing and the fuselage from gluing together. Also, make sure to not use glue the part of the connector that’s not going to be next to foam, on the fuselage side, to prevent the wing tab from adhering when you slide them together (watch out for glue seeping from under the connector towards the tab).
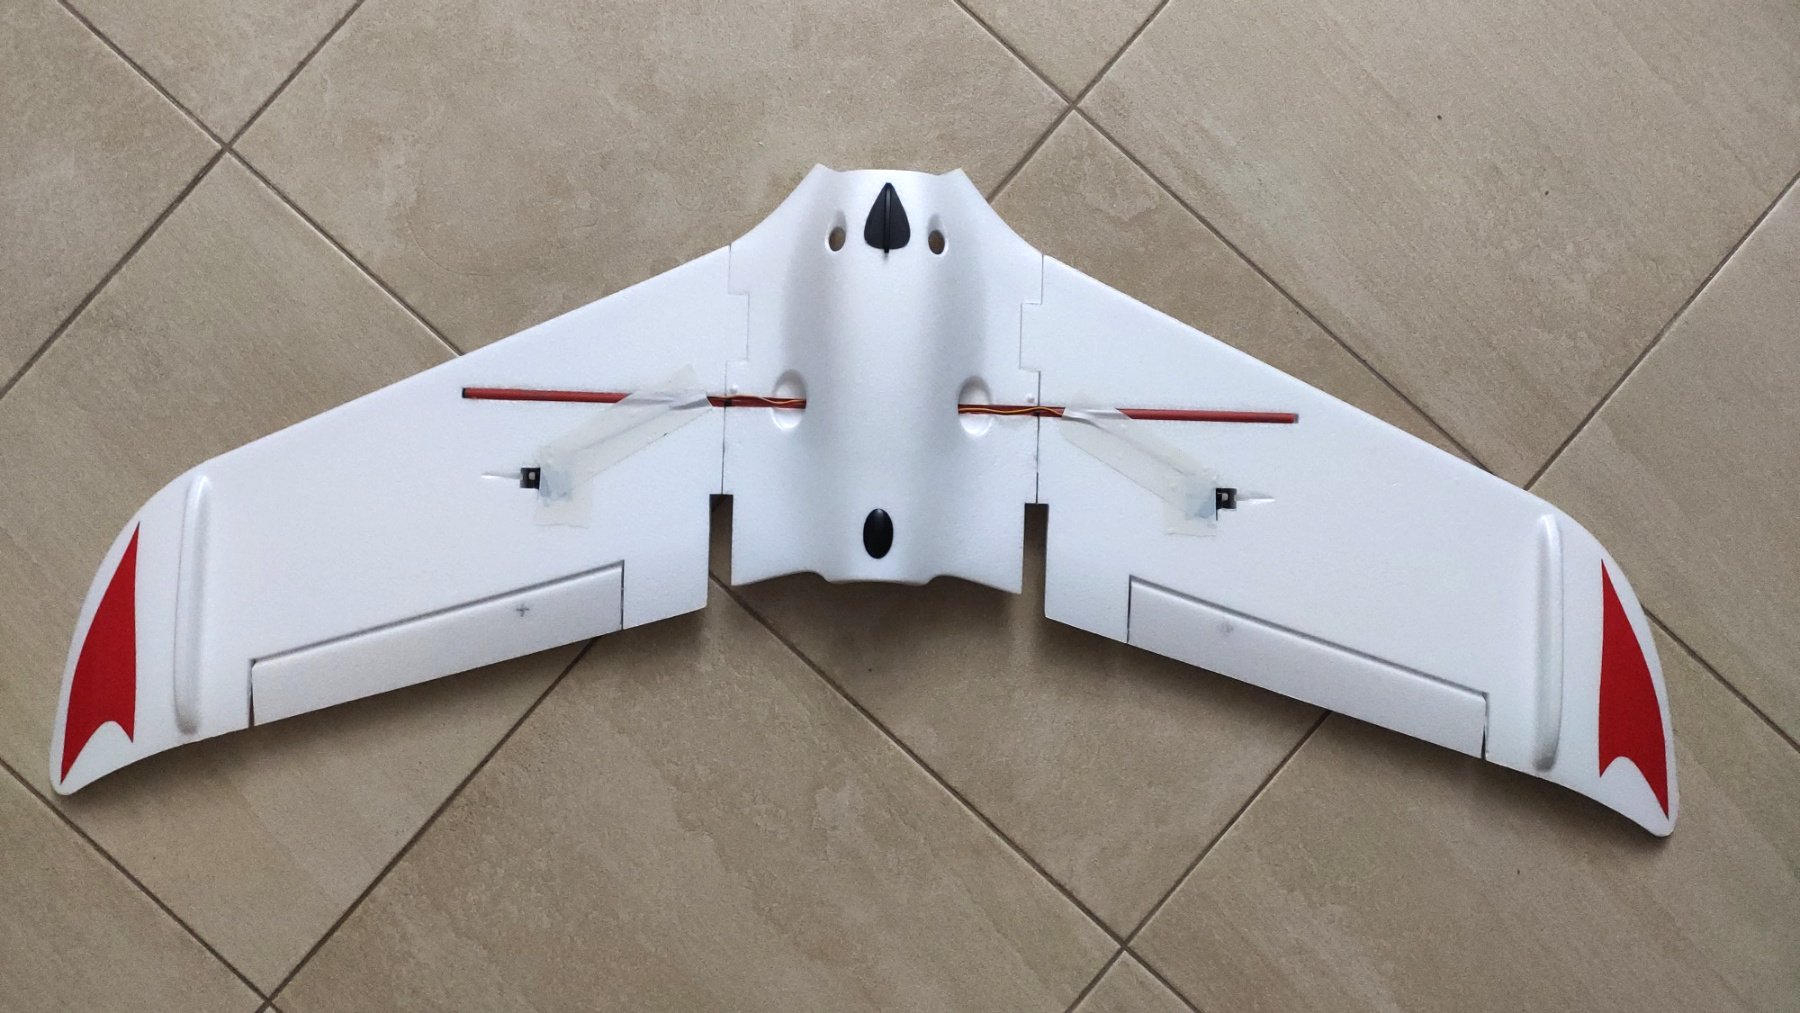
This is the end result:
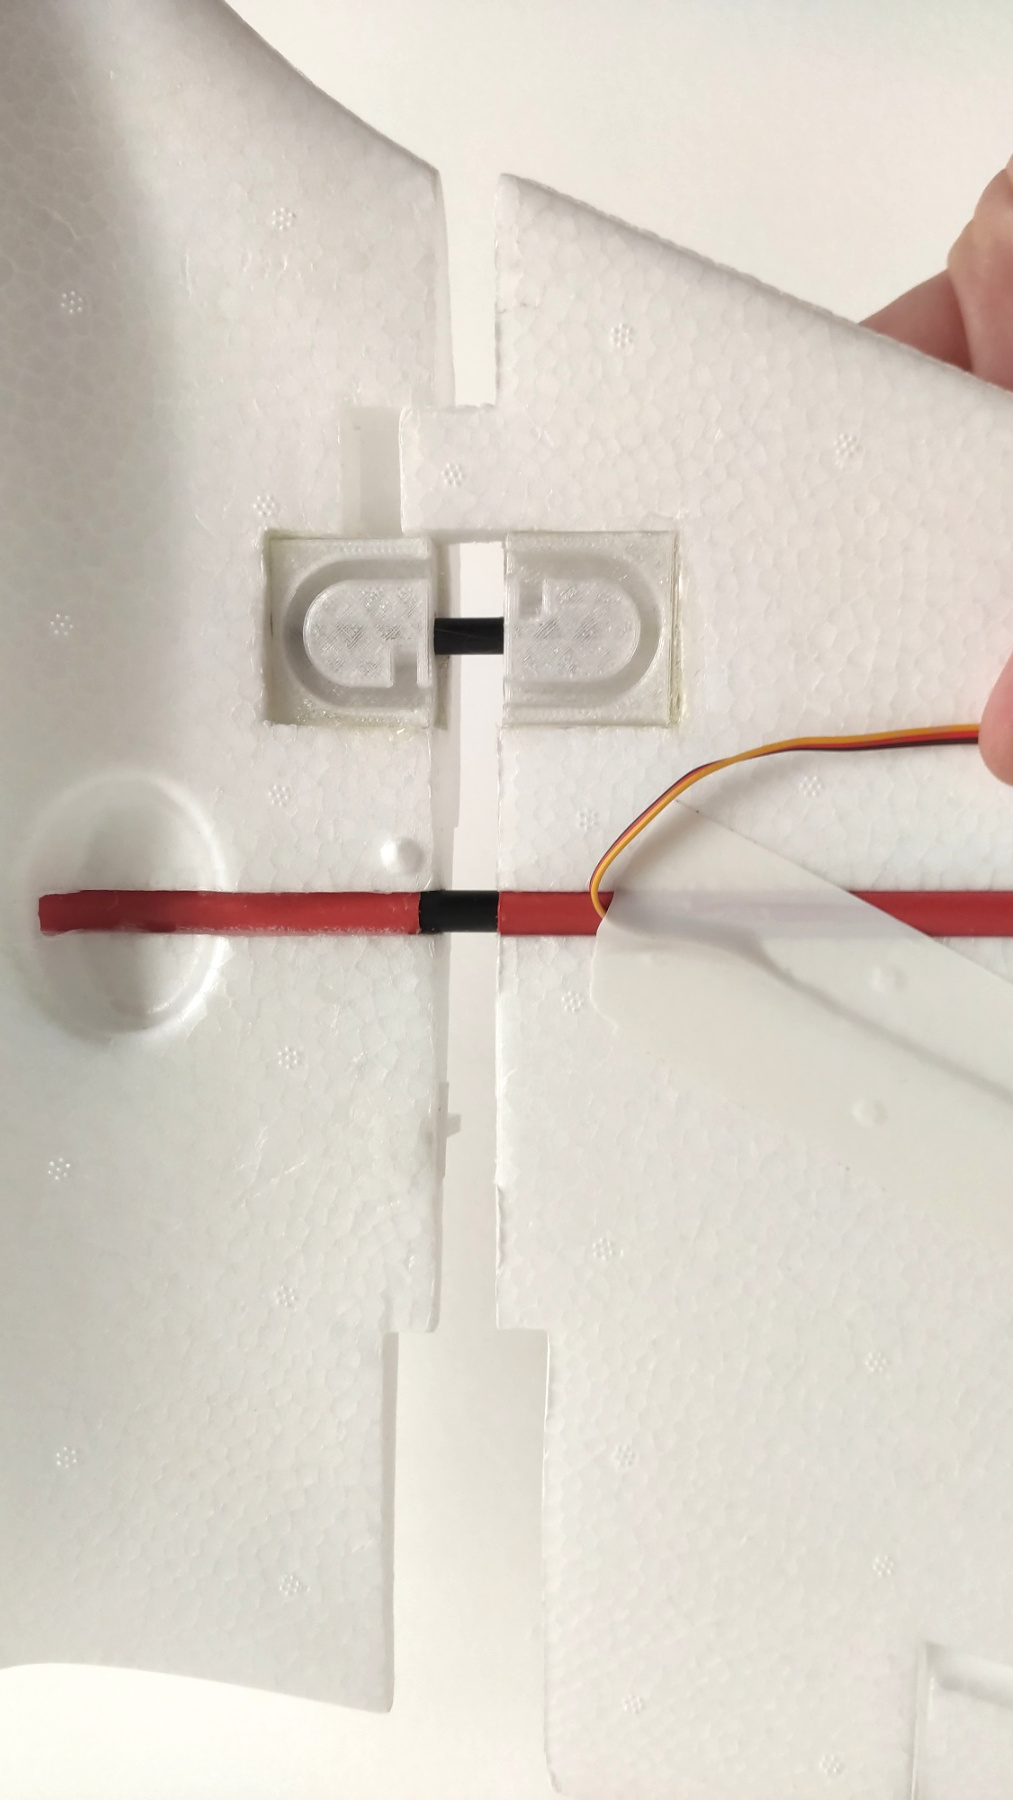
To mount the wings, just insert the spar into the fuselage, insert the wings (making sure both tubes go into their respective holes), and place the o-ring into both halves of the connector. That gives you a secure and quick assembly.
Vertical stabilizers
The last part is securing the vertical stabilizers. I did this with two very small 3D-printed pieces, I slot the stabilizers horizontally (on the left/right axis) onto the fuselage and then connect the wings, which keeps the stabilizers securely in place.
First, press the stabilizer-side part (the Π-shaped one) onto the stabilizer on the place where you want it (I put it as shown in the photo), and cut slightly inside the indentation it creates. Then, glue it into place:
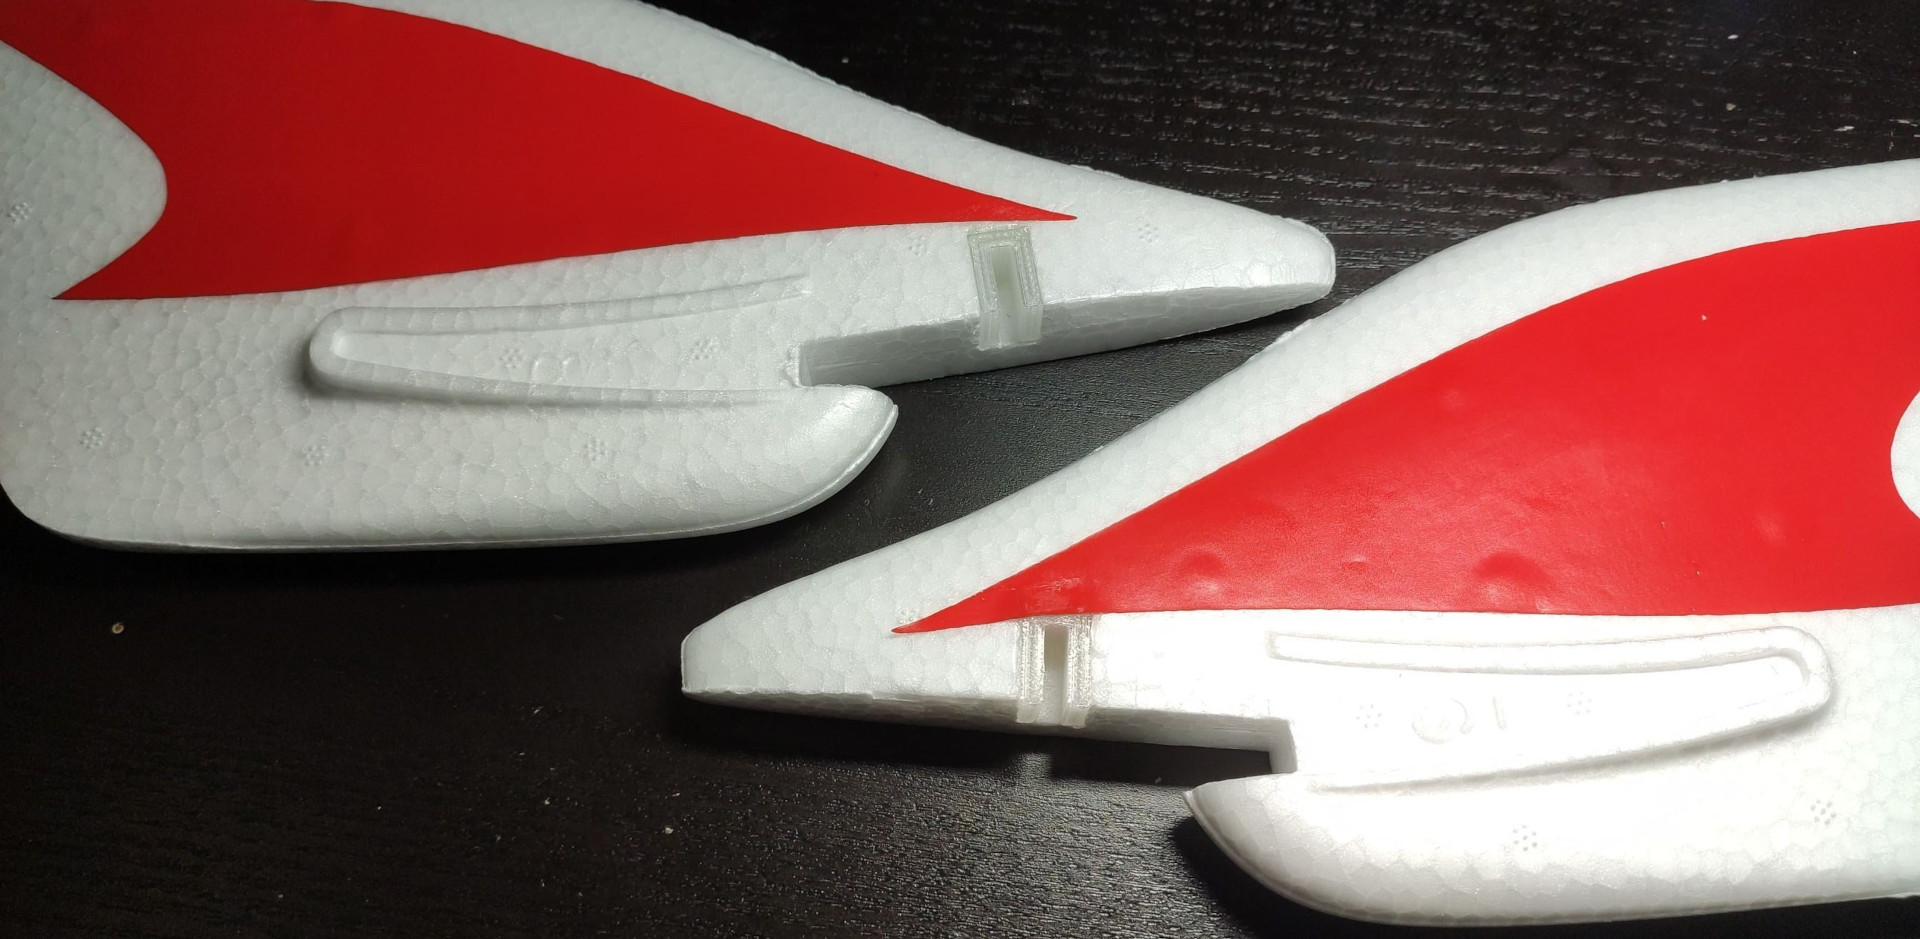
Then, insert the fuselage-side part (the inverted-T-shaped one) into the stabilizer-side part, align the stabilizer with the fuselage and press it in, to create the indentation onto the fuselage EPO, so you know where to cut. Insert the part into the cut and glue it in:
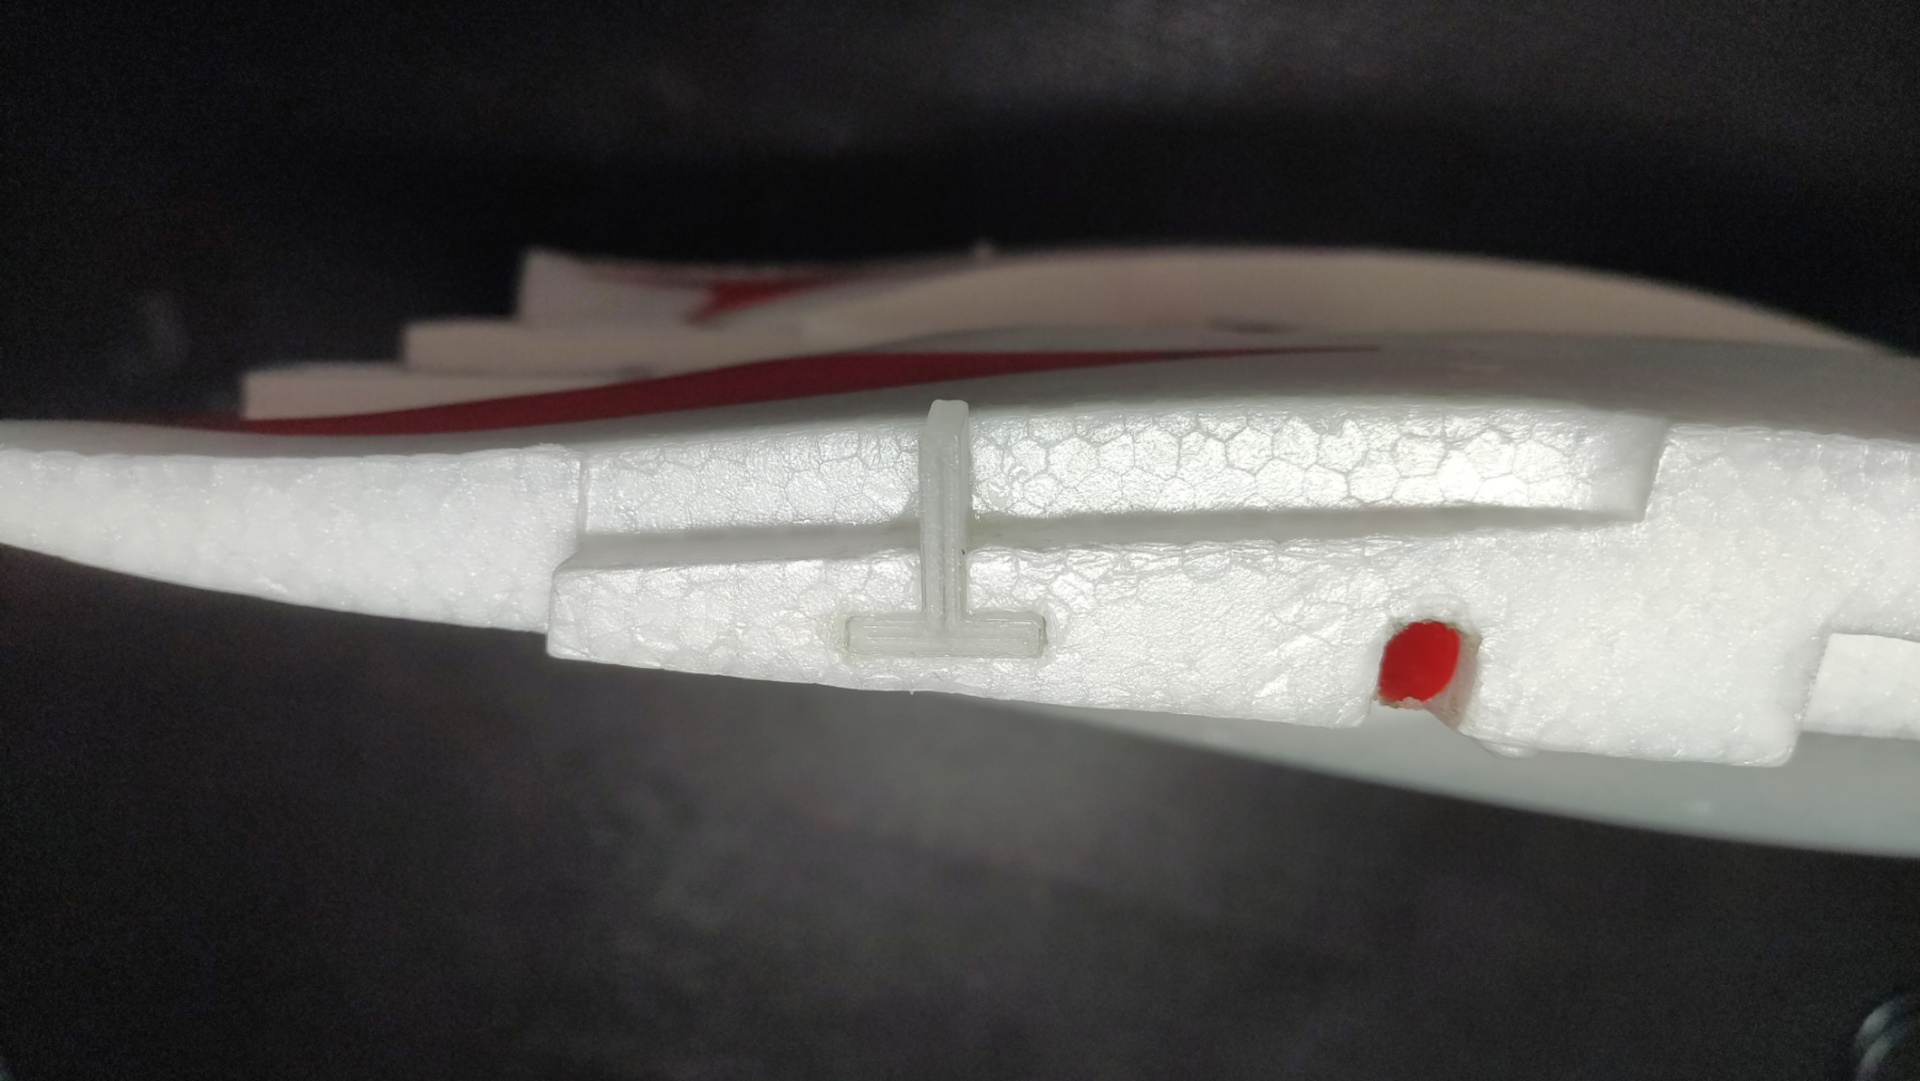
When everything has set, you can install the stabilizers by simply slotting the two parts into each other and mounting the wing. That way, the stabilizer isn’t going anywhere, and you can install and remove it very quickly.
The end
You’re done! Enjoy your disassemblable, transportable C1 Chaser!
Last updated on February 03, 2021. For any questions/feedback, email me at hi@stavros.io.